Lamp Revamp – Extreme Upcycling – Craft Room Makeover- My first time using air-dry clay
Advertising Disclosure: Upcycle Design Lab may be compensated in exchange for featured placement of certain sponsored products and services, or your clicking on links posted on this website.
Hi there and welcome to the Upcycle Design Lab. Please click here if you would like to subscribe and be notified when I upload new projects. Thanks so much for stopping by.
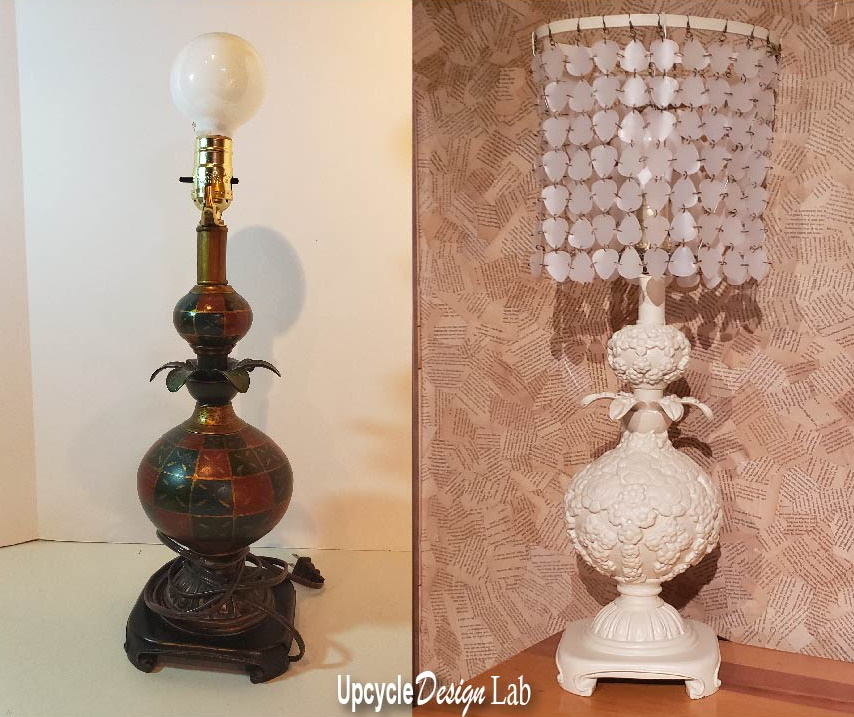
Today I am sharing another project for my craft room makeover. When I started this project I thought it was going to be fairly simple and straightforward. But if you are a crafter you know sometimes projects take on a life of their own. In the end, it took a lot longer than I thought it would. But happily, it was worth the extra effort and I really like the way it turned out. So I’m really glad I took my time and changed a few things along the way.
The project started with this kooky lamp that I bought at the thrift store. It didn’t have a lampshade or a lampshade frame But something about it intrigued me. I have actually had this lamp for a long time. It was one of those projects that I was going to get to someday. Well, happily that day has finally arrived.
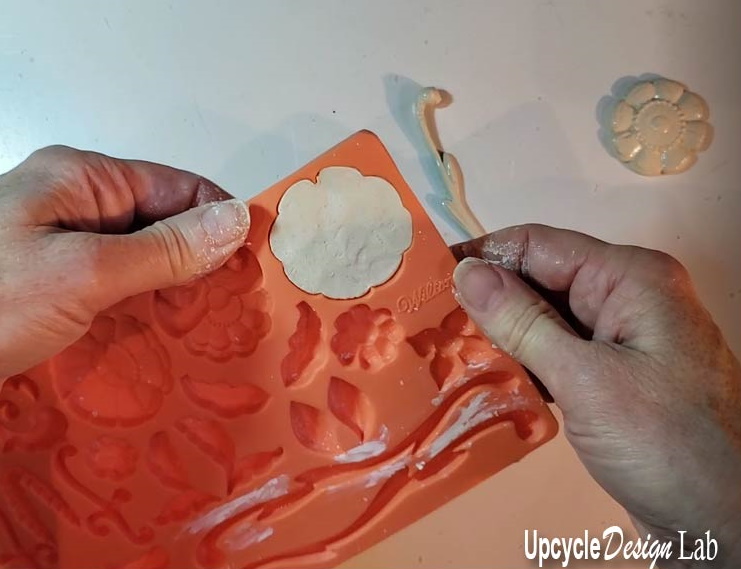
Another very happy part of this project was the air dry clay. I have never worked with this medium before, but after a few experiments, I discovered the clay was very easy to work with. And I am wondering what other projects I can make with it.
My plan was simple, make some air dry clay shapes to decorate the lamp base, paint it, construct a simple frame and design a lampshade.
Of course, there were a few bumps and design changes along the way but here are the 4 basic steps. If you’d like to see the whole project come to life you can check out the video at the bottom of this post.
The first step was to make air dry clay shapes to decorate to the lamp base. For this step, I used Crayola as air dry clay and a Wilton frosting mold.

Once I had all the clay pieces attached to the lamp base I added a coat of primer paint and filled in the gaps with a mixture of Elmer’s glue and Plaster of Paris, before applying the topcoat color.

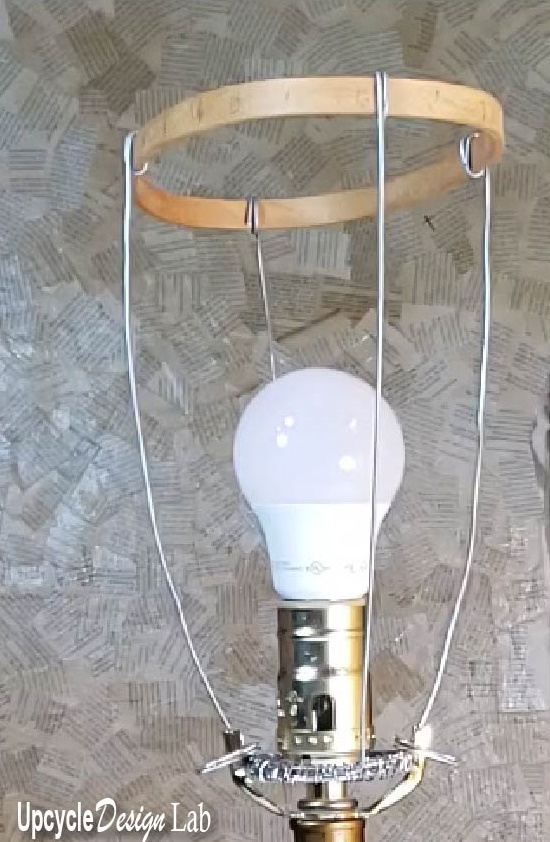
To make the frame for the shade I used some heavy gauge wire and an embroidery hoop.
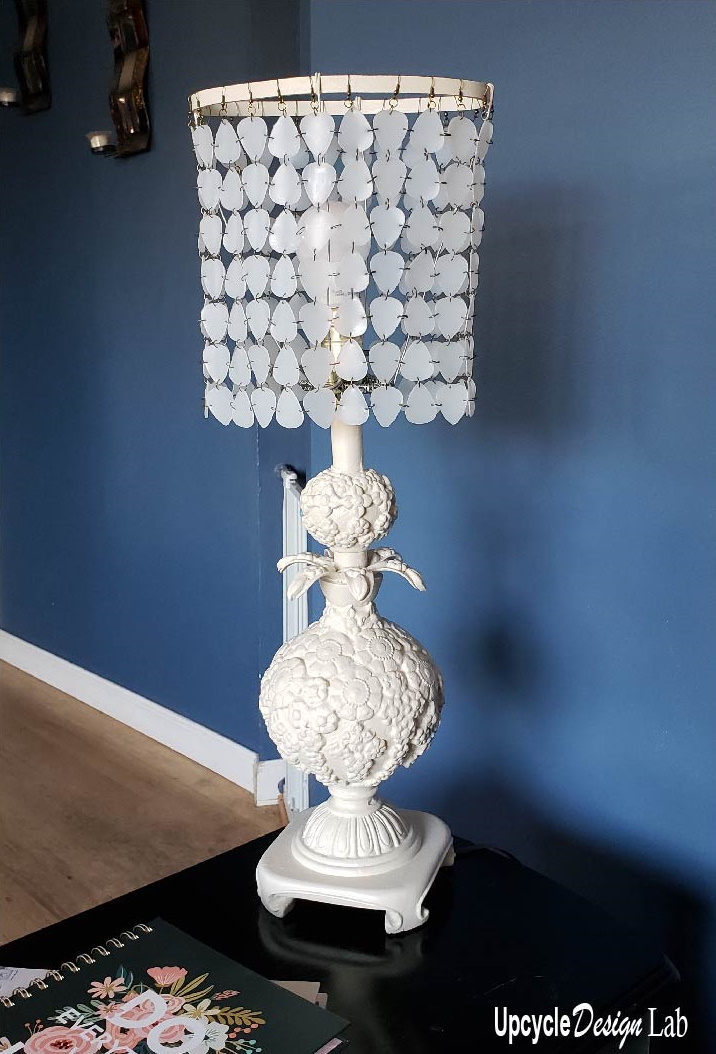
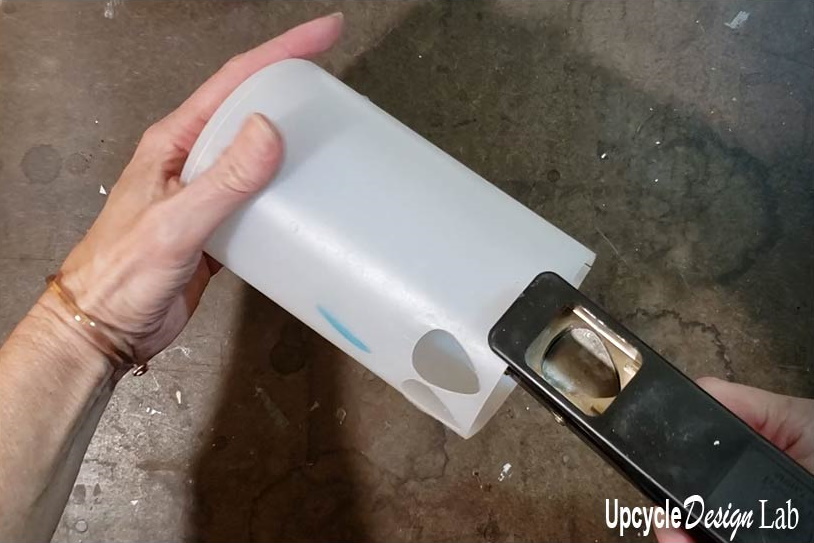
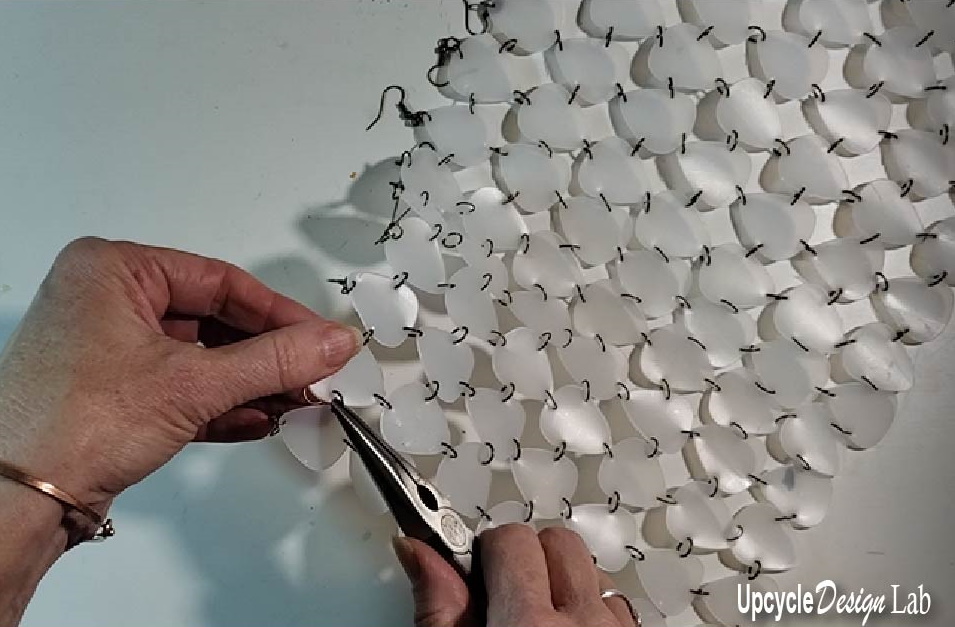
Finally, To make the lampshade I used some empty Modge Podge bottles cut into guitar pick shapes and wired together with jump rings and earring hooks.
Like I said I’m really happy with the way this project turned out.

If you’ve missed any of my other projects in this series you can get to all the links by clicking the link here.
Once again thanks so much for stopping by.
And of course,
Happy upcycling,

List of materials
Lamp, Crayola Air Dry Clay, Wilton Frosting Mold, Wood Glue, Heavy Wire, Wire Cutters, Needle Nose Pliers, Wooded Oval Embroidery Hoop, Mod Podge, Empty Mod Podge Bottles, Primer Paint, Cream Paint, Heavy Duty Scissor Cutters, Hammer, Nail, Wood Scrap, Jump Rings, Earring Hooks, Center Punch, Pick Punch, Elmer’s Glue, Plaster of Paris, Small Paint Brush
Advertising Disclosure: Upcycle Design Lab may be compensated in exchange for featured placement of certain sponsored products and services, or your clicking on links posted on this website.


I love the new look!! There are so many ways to upgrade a lamp and you hit the nail on the head!!
Thanks so much.
Very pretty. Succesful upgrade. But it just seems like sooo much work to make. I did, however, pick up some neat ideas about using jewelry making items for this type of work.