
Craft Room Makeover – Extreme Upcycling – Cardboard Baseboard and Trim
Advertising Disclosure: Upcycle Design Lab may be compensated in exchange for featured placement of certain sponsored products and services, or your clicking on links posted on this website.
Hello and welcome,
Today I am sharing the second project in my Extreme Upcycling- Craft Room Makeover series. In my last post I shared my Cardboard wall and today I am finishing off the wall with some baseboard, door trim and switch plates also made from cardboard.
Before we get on with today’s project, it is also week 12 of the Artist way and time for the final chapter review. The Chapter title is Recovering a Sense of Faith. For those of you who are just joining us, I have been reviewing this book one Chapter at a time highlighting one small thing from each chapter.
If you are struggling with the desire to be more creative or if you used to be more creative but somehow have lost your momentum, this book addresses many of the common roadblocks that people (and I should note here that I believe that includes everyone on the planet) face in their creative lives. There are hundreds of exercise and assignments as well as inspirational and motivational reading in each chapter.
The book is basically a road map to navigate the roadblocks we face in our creative lives. I have used it and referred to it many times over the last several years and found it to be helpful on many occasions. Including most recently when I took such a long break from posting and again when I decided that weekly posting was not something I can happily maintain. To that end, I have decided on an every other week posting schedule, for now, anyway. While I fear that this is not enough for the purposes of growing my blog I have decided to have some faith that fewer posts but stronger posts will eventually win the day. In short, I am opting for quality over quantity. But I guess you the readers will be the final judges.
So onward with the Chapter review. The item that stood out from this weeks chapter is actually a quote from Mickey Hart – Grateful Dead Drummer
“Adventures don’t begin until you get into the forest. That first step is an act of faith.”
I don’t know about you but as I have grown older I have pondered what adventure looks like in the latter years of life. It’s not something that I contemplated in my youth, another adventure was always just around the corner. There were new people to meet. New places to go. New things to learn. Time and the passage of it flowed in a smooth and peaceful way. I was open to new things and I had faith that things would always turn out ok.
I would say that for the most part I still trust that things will work out but I would not characterize my life as adventurous. I have climbed a few mountains (literally). It felt very adventurous at the time. When I am feeling critical of myself I might say that my last big adventure was 6 years ago when I hiked Longs Peak. But that truly is another story.
But I know that adventures while they do require some measure of courage and curiosity are not any more elusive in the second half of life than they are in the first. They are still “out there” waiting for us to pursue them just as they have always been.
Perhaps what changes in our later years is a loss of faith leading us to believe that there are no more mountains to climb in a figurative sense and no more adventures to be had in a more literal sense. It is difficult to try anything new without faith.
It may sound silly but this blog and the things that I create are little adventures for me, particularly when I stretch my ideas a little farther than I have before. When I don’t let my sensor limit my creations or worry about what “normal ” folks might think.
I am sure that I could use more faith in other areas of my life but I am thankful for the opportunity and the ability to share the things I create with those of you who appreciate them and even with those of you who criticize them.
It is adventurous to create something. It requires risk and faith. For me, the reward of making something real from an image in my head is rewarding enough for the risk and I have been doing it long enough to have the faith to try new things with more confidence than I once had. But it is still true that every project, activity or adventure requires a first step and that first step is an act of faith. Without faith, we can not move forward toward any of our dreams or desires.
So if we want to have more adventures we need to have a strong sense of faith and that is what this last chapter is all about. If you want to make something I hope you will take that first courageous step and get started and if you need a little help you might want to pick up a copy of The Artist Way. Thanks for joining me on this mini book review and now on with today’s project.
You can find all the details for this project here in the video tutorial. Or you can check out the cliff notes below. You can also check out all my other upcycled craft room makeover projects here.
Step 1 – Gather supplies.

For this project, I used Corrugated cardboard, some cracker and cereal boxes, brown packing paper, paper towel and tp tubes, some 4 ply jute cording, my cardboard cutting knives, mod podge, Elmer’s glue, hot glue, and a small paint brush.

Step 2 – Cut cardboard pieces.
To make the baseboard you will need a lot of Corrugated cardboard strips cut at 1/2 inch wide, some pieces of Corrugated cardboard cut at 3 1/4 inches wide and the cardboard cereal boxes cut to 3 1/4 inches wide on one side of the corner fold and 1/2 inch on the other side of the fold. (To make the trim change all the 3 1/4 inch measurements to 2 1/4″)

Step 3 – Glue Assembly
Glue the cereal box and 3 1/4″ corrugated pieces together aligning the edges. Piece together to the desired length.

Glue assembly
Stack and glue 1/2 inch strips of Corrugated cardboard three layers high on the box corner edge, staggering seams. Glue one layer of 1/2 inch Corrugated cardboard on the top edge of cardboard box piece.

Glue Assembly
Cut paper tubes into 3/4 inch strips. Hot glue to the top strip of Corrugated cardboard.

Glue Assembly
Hot glue cording to the bottom edge of the paper tubes and to the edge of 1/2 inch cardboard strip.

Step 4 – Finishing
To finish the baseboard use the mod podge and packing paper to cover the cardboard.

Step 5 – Cutting
Miter cut and straight cut pieces to required lengths.

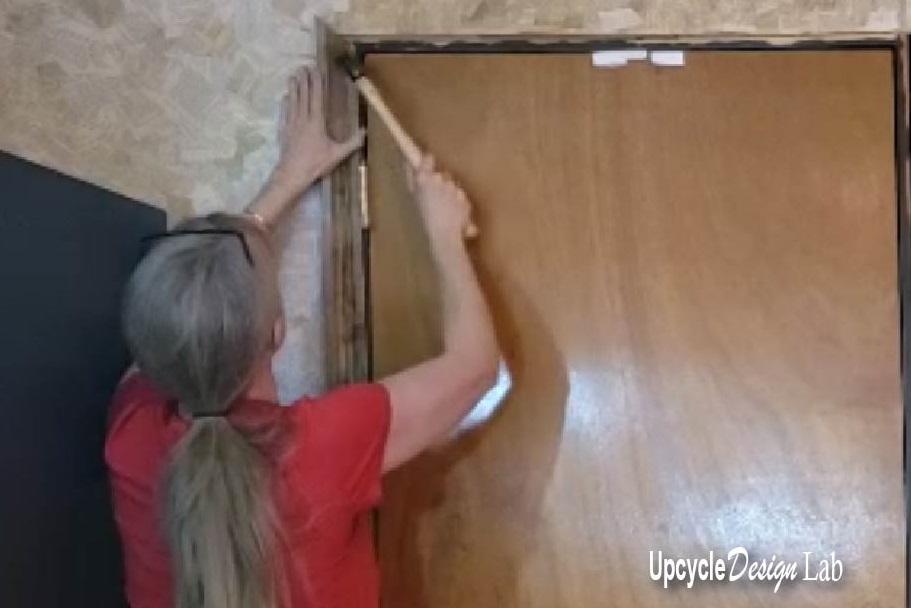
Step 6 – Nailing
Nail pieces in place.

Step 7 – Final touch up
Cover nail heads with paper mache.

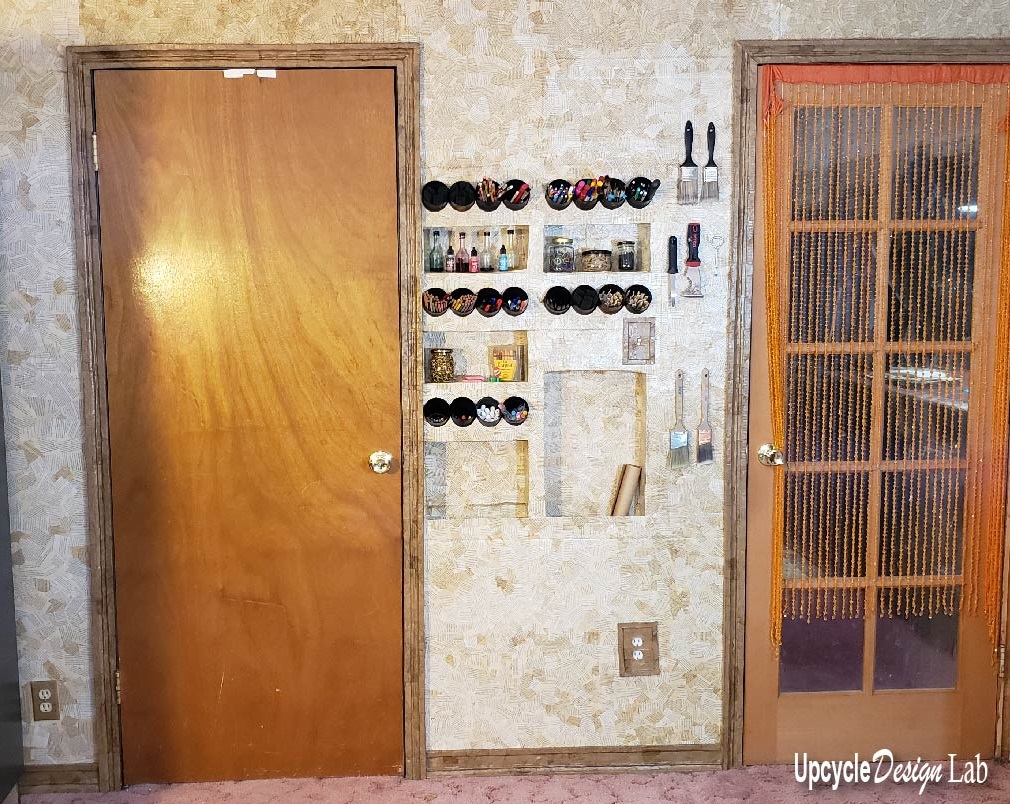
Here is a picture of the finished wall.
Thanks so much for stopping by. I would love to hear your thoughts about this project so leave me a comment if you like. Be sure to check back in a couple of weeks for my next Craft room makeover project.
Complete list of tools and supplies
- Corrugated cardboard
- Chipboard boxes (cereal or cracker boxes)
- Paper towel or TP tubes
- 4 ply jute cording
- Elmer’s glue
- Hot glue
- Brown packing paper
- Mod Podge
- Small paint brush
- Grapefruit knife
- Scissors
- Hammer
- 1 1/4″ roofing nails
- 18″ clear ruler
- Pen / pencil
- Miter box
- Hand saw
If you would like to get caught up on “The Artist Way” re-cap you can check out the following links below.
- Week One – Recovering a sense of Safety – (With upcycled pie tins made into a twisted valentine tree)
- Week Two – Recovering a sense of Identity – (With upcycled found objects candlesticks)
- Week Three – Recovering a sense of Power – (With my trashy St Patrick’s Day House Tour)
- Week Four – Recovering a sense of Integrity – (With St Patrick’s Day Plastic Bag Bouquet)
- Week Five – Recovering a sense of Possibility – (With St Patrick’s Day Mantel Display Part 1)
- Week Six – Recovering a sense of Abundance – (With St Patrick’s Day Mantel Nick Nack Crafts Part 2)
- Week Seven – Recovering a sense of Connection – (With Easter Bunny Garland and Paper Mache Eggs)
- Week Eight – Recovering a sense of Strength – (With Upcycled Easter Basket and Plastic Bag Chicks)
- Week Nine –Recovering a sense of Compassion – (With Upcycled Eggshell Easter Bunny Art)
- Week 10 – Recovering a sense of Self Protection – (With Upcycled Fence Post Easter Sign)
- Week 11 – Recovering a sense of Autonomy – (With Upcycled Cardboard Wall)
Happy Upcycling,

Advertising Disclosure: Upcycle Design Lab may be compensated in exchange for featured placement of certain sponsored products and services, or your clicking on links posted on this website.


