
Craft Room Makeover – Extreme Upcycling – Custom Paper Mache Doorknobs and Handles

Advertising Disclosure: Upcycle Design Lab may be compensated in exchange for featured placement of certain sponsored products and services, or your clicking on links posted on this website.
Hello and welcome to the Upcycle Design Lab. If this is your 1st time here I hope you’ll stick around and check out some of my other upcycled projects. If you are new to my blog and you just stumbled on to it you may feel a little bit like you have fallen down a rabbit hole, you won’t find your typical craft projects here.
I like to experiment with recycled materials to see what I can make from them. Sometimes my experiments turn out pretty close to the picture in my head other times they are a little less impressive and always there are things I learn from the process that would have made the creations better. But that is life, I guess.
I also love books and If you have stopped by before you already know about my book obsession and you know that as part of my blog posts I share with you some of my favorite books. I am currently highlighting a book called The Write Brain Workbook by Bonnie Neubauer. It is a book with creative writing prompts to help writers get through their writer’s block. And I am currently picking random writing assignments and sharing them here with you. If you are here just for the project feel free to scroll down.
Today’s writing assignment is called “name game”. The assignment is to tell the origin of your 1st name. There are some other suggestions as well as the eye-catching page below to get the writer started with the assignment. So here goes….

I don’t really know the origin of my first name. I only know my dad wanted to name me Holly but as my sister’s name was Heather my mother put an end to that flower – flower combination. I guess in a way it’s kind of strange that I have no idea where the name Cindy came from. But I wonder now if Cindy wasn’t just a common name for the time. I knew other girls with the name Cindy throughout my childhood.
To be completely accurate my given name is Cynthia but sometime in the 2nd grade I decided that was far too uppity of a name and have been Cindy ever since.
Not really knowing where to go with this assignment, I did do some research on my name but there are varying definitions of what it means. Some say its origins are French others Greek or English which leads me to believe that no one really knows. Or at least it is not at all clear to me. And since all of the definitions are so varying I have just decided to choose the one that I prefer. Which is Greek name for the goddess of the moon.
I like the celestial reference it’s aetherial and mysterious and while I don’t consider myself to be aetherial or mysterious it’s still fun to think that that’s what my name means. As I have been working on this assignment I have also been wondering how our name shapes who we are. But don’t worry I will not bore you with those thoughts today.
It is time to stop rambling and get on with today’s project. If you are just joining us this is my 5th project in my Craft Room Makeover series and it is a particularly frivolous project as it was completely unnecessary and some folks may actually prefer the original unadorned handles and knob over my new creations. I, however, am quite happy with the door handle and feel so/so about the cabinet handles.
So onward….
The plan was pretty simple, to add some dimension and shape to the handles, cover them with paper mache and then paint them to give them a rusted look.
Step one – Adding dimension

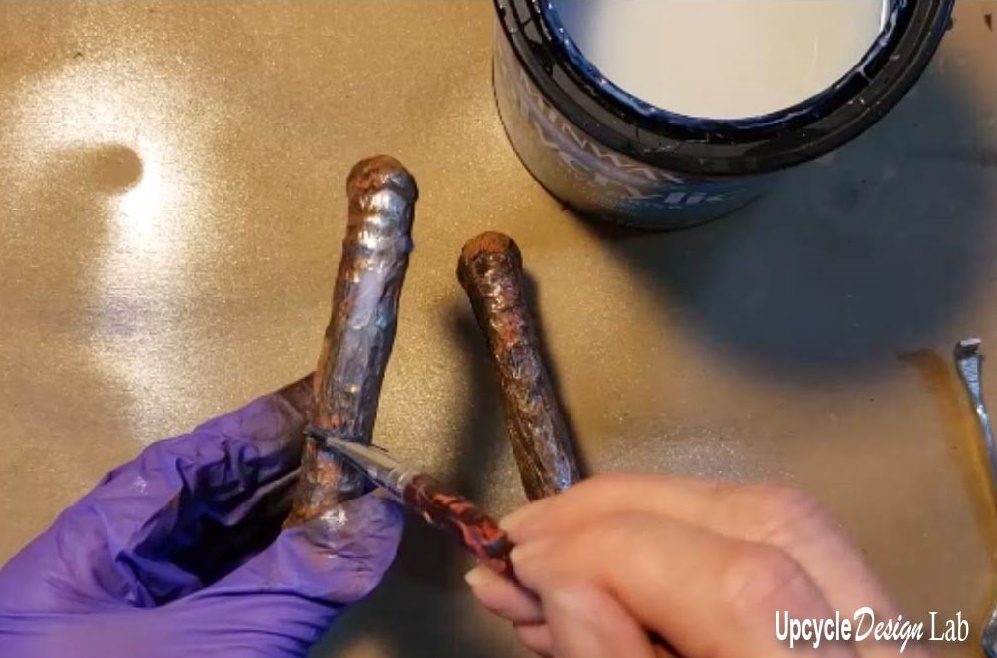
To add some dimension to the plain white cabinet handles I added some twine using my hot glue gun. For the door handle, I used hot glue and gorilla glue to glue on some pieces of tin foil and a rounded bottle cap.
Step Two – Paper Mache

Next, I used a small paintbrush some Modge podge and small pieces of tissue paper to cover all of the handles.
Step Three – Paint Faux Rust Finish
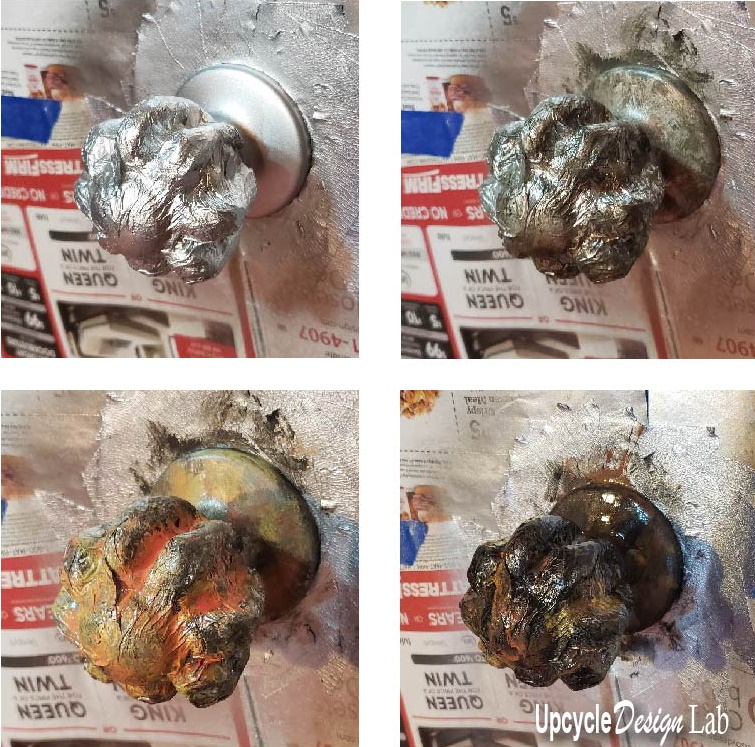
This step was pretty experimental I started with a coat of silver spray paint and then added the dark gray, yellow and orange.
Step Four – Finish and Seal
The final step was to brush on a thin coat of men waxed high gloss clear polycrylic.
You can find all the details in the video below.
Advertising Disclosure: Upcycle Design Lab may be compensated in exchange for featured placement of certain sponsored products and services, or your clicking on links posted on this website.
Here is a list of all the items used to make this project
- Dapping Block
- Hammer
- Mod Podge
- Recycled Tin Foil
- Sand Paper
- Gorilla Glue
- Recycled Tissue Paper
- Recycled Bottle Cap
- 4 Ply Jute Twine
- Dark Gray Paint
- Yellow Paint
- Orange Paint
- Small Paint Brush
- Paper Towel
- Silver Spray Paint
- Hot Glue
- Minwax High Gloss Polycrylic
- Scissors
Happy Upcycling,


